
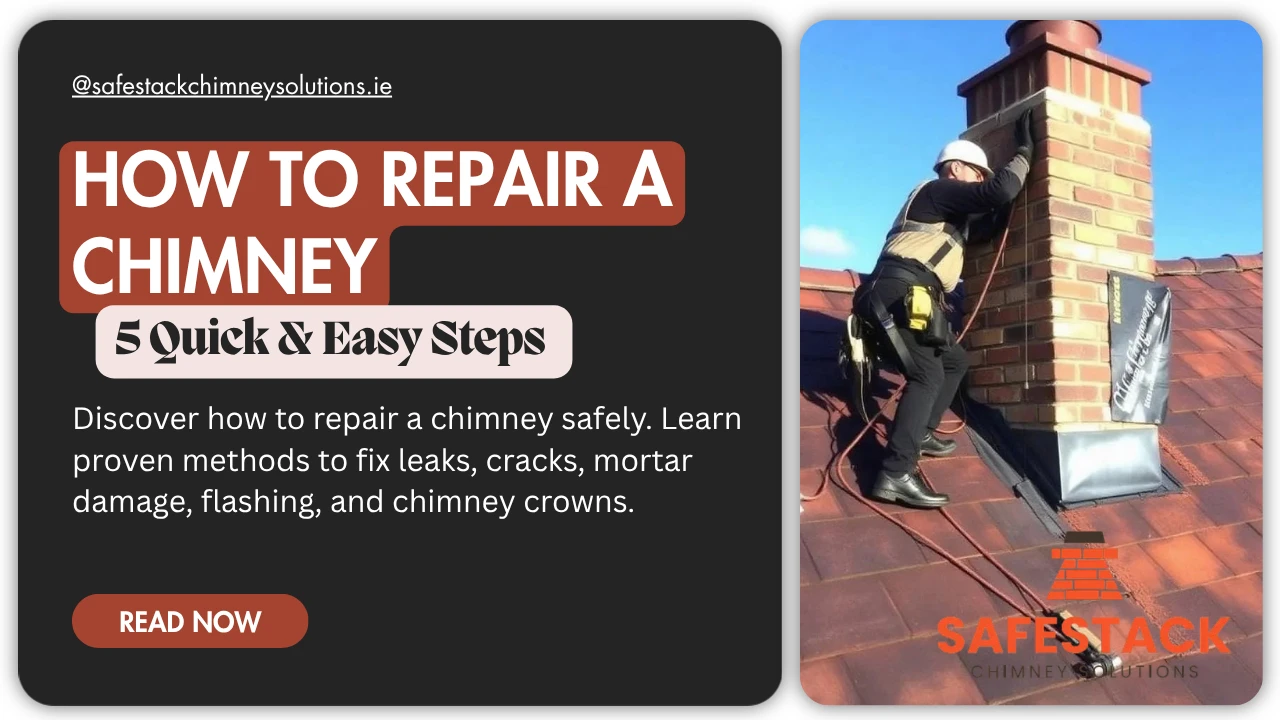
A damaged chimney is a serious risk. It can leak water, drop bricks, or start a house fire. Knowing how to repair a chimney helps you act fast and avoid higher costs later. Most small faults grow fast in Irish weather, where wet winters and salt-heavy coastal winds push damp deep into the brickwork.
We work with chimneys every week at Safe Stack Chimney Solutions. Our team sees the same faults again and again. In this guide, we share a clear step-by-step plan, the right tools, and the safe limits of DIY work. You will learn which jobs you can handle from the ground, which need a roof ladder, and which should always go to a qualified pro.
Read the full guide before you climb up. A few minutes of planning saves hours of rework and keeps you safe on the roof.
Know the Parts of Your Chimney First
Before you start any repair, learn the main parts. Each part has its own job and its own fix. The diagram below shows what to look at and helps you describe the fault if you need to call a chimney specialist.

- Cap: a metal cover on top that blocks rain and birds.
- Crown: sloped concrete slab that sheds water off the top.
- Pot: a clay or concrete piece that opens to the outside.
- Flue liner: a tube inside the chimney that guides smoke out.
- Mortar joints: cement between the bricks that seals the stack.
- Flashing: a metal strip that seals the chimney to the roof.
Take a few minutes to spot each of these parts on your own chimney from the garden. A small pair of binoculars helps you check the cap and crown without climbing up. If any part looks loose, cracked, or missing, write it down before you plan the repair.
Tools and Materials You Will Need
Gather the right kit before you start. A wrong tool slows the job and can damage the brick. Lay everything out on a dust sheet so nothing rolls off the roof while you work.
- Safety harness and roof ladder
- Hard hat, gloves, and safety glasses
- Pointing trowel and small bolster chisel
- Stiff wire brush
- Pre-mixed mortar or sand and cement
- High-temperature chimney sealant
- Lead or aluminium flashing
- Stainless steel flue liner (if needed)
- Bucket, dust sheet, and waste bag
Buy quality materials. Cheap mortar and silicone fail in two or three winters. Good lead flashing, a proper crown coat, and a stainless cap can last decades and pay for themselves many times over.
How to Repair a Chimney: 5 Core Steps
Most chimney repairs follow the same path. Use these five steps as your base plan. Skip a step, and water will find a way in. Work from the top of the stack down, so dust and debris fall clear of finished joints.
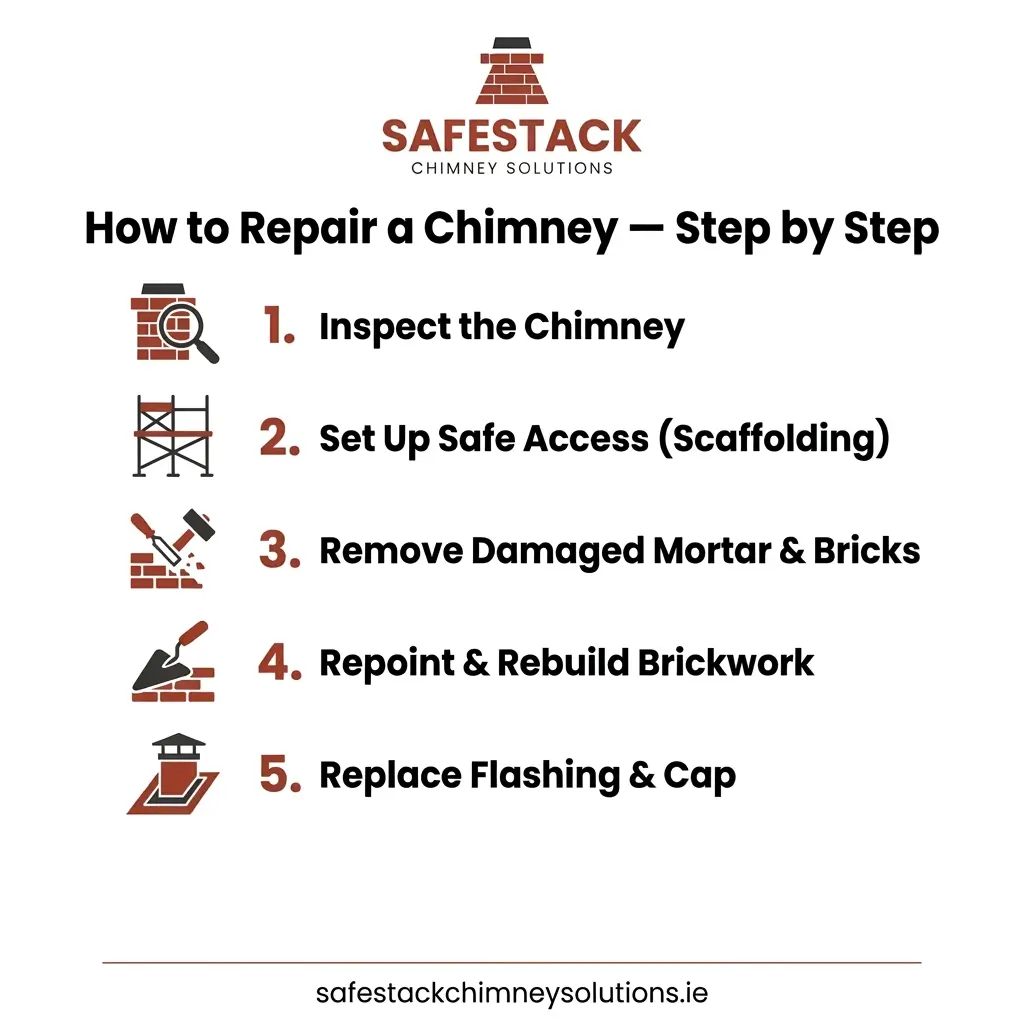
Step 1. Inspect the Chimney
Start with a full check from the ground and the roof. Look for cracks, loose pots, missing mortar, and rust on the cap. Take photos of every fault you see, then number them so you can match each one to a fix later.
Inside the home, check for brown stains on the ceiling near the chimney breast. These stains often mean water is getting past the flashing or crown. Run your hand along the plaster too; a cool, slightly damp patch is an early sign of a hidden leak.
Finish the inspection in the attic. Shine a torch on the brickwork where the stack passes through the roof. Dark streaks, white salt marks, or rotten timber all point to long-term water damage that needs urgent repair.
Step 2. Repoint the Mortar Joints
Old mortar lets in water and weakens the stack. Repointing means cutting out old mortar and pressing in new mortar. This is the most common chimney repair, and it is also the one most homeowners get wrong by using the wrong mix.
- Rake out old mortar to a depth of about 20mm.
- Brush the joints clean with a stiff wire brush.
- Mix mortar to a stiff, butter-like texture.
- Press mortar into joints with a pointing trowel.
- Smooth the joints and let them cure for 24 hours.
Use a lime-based mortar (NHL 3.5) on older Irish homes. Modern Portland mix is too hard, and it traps damp inside soft Victorian brick. Mist the joints with clean water before and after pointing to slow the cure and stop hairline cracks.
Step 3. Replace or Refit the Chimney Cap
The cap stops rain, birds, and leaves. A broken cap leads to fast inside damage. Here is how to repair a chimney cap.
- Unscrew or lift off the old cap.
- Clean rust and old sealant from the pot rim.
- Set the new cap level on the pot.
- Fix it in place with stainless screws or clamps.
- Run a bead of chimney sealant around the base.
Pick a stainless steel cap with a mesh side. It blocks animals and still lets smoke out. Galvanised caps rust fast in salty coastal air, so spend the extra few euros on 316-grade stainless if you live near the sea.
Step 4. Repair the Chimney Crown
The crown is the concrete slab on top of the stack. Cracks here let water seep into the bricks. Here is how to repair a chimney crown.
- Brush off loose pieces and dirt.
- Fill small cracks with high-temperature chimney sealant.
- For larger cracks, apply a crown coat with a trowel.
- Slope the surface so water runs off, not in.
- Let it dry for 24 to 48 hours before rain.
A full crown rebuild needs new concrete poured around the posts. That job is best left to a chimney expert. A proper crown should overhang the brickwork by 40-50mm with a drip groove cut underneath, so water drops clear of the stack instead of running back down the face.
Step 5. Seal the Flashing
Flashing is the top cause of chimney leaks. The metal strip can lift in storms or rust over time. Atlantic gales are tough on lead, so check the flashing twice a year, not just after damage shows inside.
- Lift any loose flashing gently with a flat bar.
- Clean out old sealant and debris.
- Press the flashing flat against the chimney.
- Apply a thick bead of lead flashing sealant.
- Smooth the bead with a wet finger or trowel.
If the flashing is torn or badly rusted, replace it with new lead. A full replacement lasts 30 years or more. Use Code 4 or Code 5 lead and tuck the upper edge at least 25mm into a clean chase in the mortar joint. Surface-mounted lead never lasts.
How to Repair a Cracked Chimney
A cracked chimney is more than a cosmetic fault. Cracks let water in and grow each winter from freeze damage. Acting early stops a small fix from turning into a rebuild.
For hairline cracks, use a brush-on masonry waterproofer over the area. For wider cracks, cut them out, fill with mortar, and finish flush with the brick face. Always seal the surface after the mortar cures.
Watch for stepped cracks that run along the mortar joints in a staircase pattern. They often mean the stack is moving on a weak flaunching or a sunken roof timber. That kind of crack will keep coming back until a pro fixes the cause, not just the gap.
How to Repair a Leaking Chimney
A leaking chimney shows up as brown stains, damp smells, or peeling paint near the chimney breast. The water has four common entry points.
- Cracked crown or missing cap.
- Open mortar joints.
- Lifted or torn flashing.
- Porous bricks are soaking up rain.
Fix each entry point in turn. Start at the top with the cap and crown, then work down to the joints and flashing. End with a clear breathable masonry sealer on the brick face.
After the repair, wait through one heavy rain before you redecorate inside. Fresh stains on a dry ceiling tell you a leak path is still open. It is far cheaper to chase one missed gap than to repaint a whole room twice.
How to Repair a Chimney Flue
The flue is the inner tube that carries smoke and gas out of the home. A damaged flue is a fire and carbon monoxide risk. Carbon monoxide is a gas you cannot see or smell, and it can be deadly while you sleep.
Here is how to repair a chimney flue safely:
- Book a smoke test or camera inspection first.
- Sweep the flue clean of soot and debris.
- For small cracks, use a heat-rated flue sealant.
- For broken sections, fit a new stainless steel flue liner.
- Test the draft with a smoke pellet after the repair.
Flue work needs skill and the right kit. We handle most flu jobs in a single day with full safety checks. Always fit a fresh carbon monoxide alarm in the same room as the fire after any flue repair; Irish building regulations require one, and it is your best early warning if the new liner ever fails.
Safety Rules Before You Start
Chimney work happens at height. A fall can be life-changing. Follow these rules every time, even for a quick five-minute job.
- Never work alone on a roof.
- Use a proper roof ladder, not a step ladder.
- Wear a harness and clip to a fixed point.
- Avoid wet, icy, or windy days.
- Check the forecast before you climb up.
- Wear a dust mask when cutting old mortar.
If you feel unsure at any point, stop and call a pro. A safe repair is always cheaper than a hospital stay. Drop a rope to ground level before you climb so you can pull tools up instead of carrying them in one hand on the ladder.
When to Call a Chimney Expert
Some fixes are not safe for DIY. Call a specialist if you see any of the signs below.
- The stack leans to one side.
- You see daylight inside the flue.
- Bricks or chunks of mortar fall off the chimney.
- Smoke backs up into the room often.
- You smell gas or feel headaches near the fire.
- The chimney is over three storeys high.
At Safe Stack Chimney Solutions, we give fixed price quotes and full photo reports of every repair. A professional report also protects you if the chimney later becomes part of an insurance claim or a house sale.
How to Stop Chimney Damage from Coming Back
A good repair lasts longer with simple care. Use this short routine each year to catch small faults before they cost you a full rebuild.
- Book a sweep once a year if you light fires often.
- Check the cap and crown after each storm.
- Apply a breathable masonry sealer every 5 years.
- Clear gutters around the chimney to stop water pooling.
- Trim trees that drop leaves near the cap.
Keep the sweep certificate and any inspection photos in a folder. They prove a clear maintenance record and make a strong insurance claim if a storm later damages the stack.
Frequently Asked Questions
Can I repair a chimney myself?
You can handle small jobs like resealing a cap or filling a hairline crack. Leave repointing, flue work, and rebuilds to a trained chimney expert. If you have never worked on a roof before, even a simple cap job is best done with a pro on site for the first time.
How long does a chimney repair last?
Quality repointing lasts 25 to 50 years. A new cap lasts about 30 years. A new flue liner lasts 15 to 25 years with normal use. Lifespan drops fast if the chimney faces the prevailing wind or sits near the coast, so plan an extra check every two years in exposed locations.
What is the best sealant for a chimney crown?
Use a high-temperature, flexible masonry crown sealant. Avoid standard silicone, which cracks and peels in heat. Crown-grade sealants stay flexible through the freeze-thaw cycle and bond well to concrete and brick.
How do I know my flue is damaged?
Watch for smoke coming back into the room, soot on the wall above the fire, or a sharp burning smell. Book a camera inspection to be sure. A working carbon monoxide alarm is your second line of defence and should never be skipped.
Is chimney repair covered by insurance?
Storm and lightning damage is often covered. Wear, age, and neglect are not. Keep records of yearly sweeps and photos of any past repairs to support a claim and speed up the loss adjuster’s visit.
Get a Fixed Price Chimney Repair Quote
You now know how to repair a chimney from cap to flashing. You also know which jobs need an expert. The next step is a proper inspection so you can plan the work before the next storm season.
Contact Safe Stack Chimney Solutions for a free quote. We give clear pricing, honest advice, and lasting repairs across Ireland.